W990 Drop Visor Installation Guide
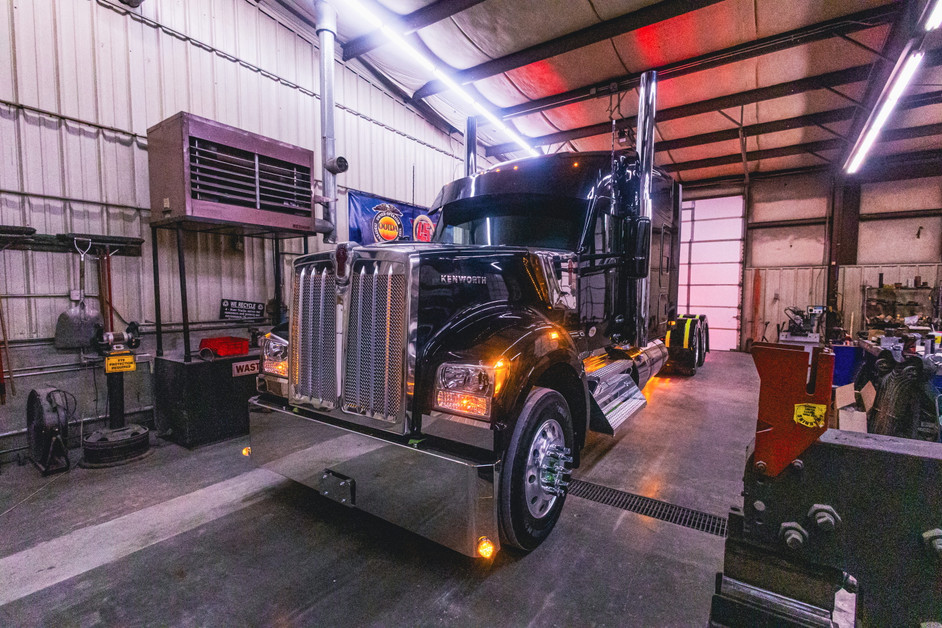
How to Install a W990 Visor
Installing a Kenworth W990 visor requires careful measuring, test-fitting, drilling, wiring, sealing, and final alignment.
The most important part of the installation is not rushing the layout and aligning your visor mount points with the OEM drill holes in the cab.
A visor that is slightly crooked, mounted too low, or sealed poorly can create visibility issues, water leaks, wind noise, or an uneven finished look. Here's how to complete a proper installation.
The Basic Installation Steps for Kenworth W990 Visor
Step 1: Clean off the cab mounting area.
Step 2: Protect the roof and upper windshield area with painter’s tape.
Step 3: Set the visor in place for a dry fit.
Step 4: Center the visor using the windshield, cab seams, and roofline as reference points.
Step 5: Mark the mounting holes.
Step 6: Re-check both sides for even height.
Step 7: Drill pilot holes.
Step 8: Deburr and protect exposed metal.
Step 9: Route wiring, if using a lighted visor.
Step 10: Seal all drilled holes and wire pass-throughs.
Step 11: Lightly fasten the visor.
Step 12: Align the visor before final tightening.
Step 13: Test lights, washer spray, wipers, doors, and sightline.
Step 14: Perform a water test and short road test.
The Tools Needed to Install the W990 Visor
Before beginning the install, gather the right tools and hardware. Most W990 visor installations require:
- Drill
- Correct-size drill bits or step bit
- Measuring tape
- Painter’s tape or masking tape
- Marker or pencil
- Screwdrivers
- Ratchet and socket set
- Wrenches
- Level or straight edge
- Deburring tool or small file
- Silicone sealant or weatherproof sealant
- Rubber well nuts or expansion nuts
- Mounting bolts, screws, and washers
- Light pigtails or wiring connectors, if installing a lighted visor
- Electrical tape or heat-shrink connectors
- Test light or multimeter
- Cleaning cloths
Painter’s tape is especially useful because it protects the paint while giving you a clean surface for marking drill points.
Mounting Considerations
The visor should be test-fitted before any holes are drilled. Set the visor in place and check how it follows the W990’s cab roofline, windshield curve, and upper windshield edge.
Important mounting points to verify include:
- Whether the visor is centered over the windshield
- Whether both sides sit at the same height
- Whether the visor follows the cab contour evenly
- Whether the brackets line up with the cab structure
- Whether the visor is designed for a day cab, flat top, mid-roof, or sleeper cab
- Whether the visor uses side mounts, blind mounts, factory-style brackets, or well nuts
Blind mount visors usually create a cleaner finished look because the hardware is less visible, but they also require more careful alignment. Side mount or bracket-style visors may be easier to position, but the visible hardware needs to sit evenly for the install to look professional.
For a clean installation, lightly tighten all fasteners first. Do not fully tighten one side before the rest of the visor is aligned.
Clearance Checks
Before final mounting, check all nearby components for clearance. A W990 visor can affect visibility and may interfere with other cab-mounted accessories if it is too deep or mounted at the wrong angle.
- Check clearance around:
- Windshield wipers
- Mirror arms
- Antennas
- Cab lights
- Roof marker lights
- Air horns
- Exhaust stacks
- Windshield washer spray pattern
- Door opening path
- Upper windshield sightline
Deep drop visors, pointed visors, curved visors, and bowtie/reverse bowtie designs can reduce upper windshield visibility.
Granted, this may not be a problem for show builds, but it matters for daily-use trucks, tight yards, loading docks, hills, and overhead traffic lights.
The visor should improve glare control without creating a visibility problem for the driver.
Lighting Compatibility
Many W990 visors are available with light holes or optional marker light layouts. Before installation, verify whether the visor is blank, pre-drilled, or designed for specific light sizes.
Common light considerations include:
- 3/4-inch round LED light holes
- 2-inch round LED light holes
- ID light patterns
- Amber marker lights
- Wind vane light options
- Wiring pigtails
- Clearance light circuit compatibility
- Wire routing through the cab or roof area
If the visor has lights, test the lights before final installation. This helps confirm that the LEDs, pigtails, polarity, and wiring connections work before the visor is fully mounted.
Any drilled wiring pass-throughs should be deburred and sealed. Poor wire routing can lead to chafing, water leaks, flickering lights, or a messy-looking install.
Common Mistakes to Avoid When Installing a W990 Visor
The biggest installation mistakes usually happen during layout, drilling, and sealing.
Avoid these all-too common problems!
Drilling before test-fitting the visor
Always position and check the visor first. Once holes are drilled, mistakes are difficult to hide.
Mounting the visor off-center
Even a small alignment issue can be obvious from the front of the truck.
Choosing the wrong visor for the cab configuration:
A visor made for a day cab may not fit the same as one designed for a flat top sleeper, mid-roof sleeper, or larger W990 cab setup.
Skipping clearance checks
The visor needs to clear wipers, mirrors, lights, antennas, and roof accessories.
Over-tightening fasteners
Too much pressure can distort the visor, damage the mounting surface, or make the visor sit unevenly.
Failing to seal drilled holes
Unsealed holes can allow water into the cab roof or upper windshield area.
Poor wiring practices
Loose wiring, exposed connections, or sharp hole edges can cause electrical problems later.
Ignoring sightline changes
A deep drop visor may look aggressive, but it can reduce upward visibility if mounted too low.
Not checking light operation before final assembly
Test the lights before everything is fully tightened and sealed.
Before You Drill: How to Confirm the Visor Actually Fits Your W990
The W990 has the same 2.1-meter cab width that a T680 and T880 has. Therefore, any visor that fits these models will fit your W990. Double check the fitment of the product before you buy it.
Check: 40-inch flat top vs. mid-roof vs. large sleeper differences.
Since the roof line is lower on a W990 40-inch flat roof setup, the visor bracket mounts attach to the side door/cab frame to brace the visor without interfering with the pillar deflectors.
Check: potential factory cab light interference.
Obviously, this can happen if there are roof-mounted cab lights in the way of a drop visor mount.
Shop for Kenworth W990 Drop Visors at 4 State Trucks
Explore a wide range of aftermarket visors that fit the W990 model. Shop using our mobile app for convenience, or drop by the Four State Trucks brick and mortar shop in Joplin, Missouri to get your new stainless steel visor installed on the spot.
Recent Posts
-
Haul of Fame: J&L Contracting's Award-Winning Truck
 Kenworths: Never Satisfied & Devilish Ways When you talk about Midwest trucking, heavy hauling, and …17th Sep 2026
 -
Semi Truck Exhaust Systems: Parts, Materials, Fitment & Repair Guide
 How a Semi Truck Exhaust System Works A heavy-duty exhaust system has three main jobs: route burned …16th Sep 2026
 -
Diesel Truck Engine Maintenance Guide
 Semi truck engines can last up to one million miles, or more, before they need to be rebuilt or repl …4th Sep 2026
 -
How to Buy the Right Peterbilt 379 Radiator
 If you want to keep your diesel engine from overheating you need a well-functioning replacement Pete …28th Aug 2026
 -
10 Essential Cost-Per-Mile Truck Upgrades that Pay for Themselves
 Small aftermarket semi truck accessories and performance upgrades save more money over time than the …21st Aug 2026
 -
Seasonal Semi Truck Maintenance Checklist
 Freezing winter weather temperatures, heavy snow, ice, and road salt take an unseen toll on your sem …14th Aug 2026
 -
Haul of Fame: Richard Bonner’s 1996 Peterbilt 379 — Bringing a Classic Trucker’s Truck Back to Life
 Every truck has a story, but some are worth taking a closer look at. Richard Bonner’s 1996 Peterbilt …14th Aug 2026
 -
Surviving the Scale: How to Pass Your DOT Inspection & Avoid Crippling Fees
 DOT semi truck inspections can make anyone nervous. There are multiple levels that start from a quic …7th Aug 2026
 -
Semi Truck Brake System Maintenance Guide
 Semi-truck brake defects account for 30% of out-of-service violations, according to CVSA’s 2025 Inte …4th Aug 2026
 -
How to Build a Semi Truck Emergency Kit (A Complete Checklist)
 Semi-truck breakdowns cost money and time; but they aren't inevitable. With the right emergency acce …30th Jul 2026