
9 Costly Peterbilt 379 Exhaust Stack Replacement Mistakes to Avoid

Replacing exhaust stacks on a Peterbilt 379 is a bit easier than some other truck models, the installation process can still be time-consuming and tedious.
If you're an owner-operator installing new exhaust parts in your garage. Get ready.
Because a single faulty piece of hardware could be the difference between an over-the-weekend DIY-installation that takes a few hours or several weeks!
Looking to avoid all of that? This guide is here to help.
Here are the 9 most common semi truck exhaust installation mistakes that lead to devestating, costly downtime.
#1. Buy Extra Exhaust Hardware ASAP
While Peterbilt 379 exhaust kits are fairly comprehensive, they don’t account for everything needed to secure the entire exhaust system.
You’ll need to buy additional exhaust components separately.
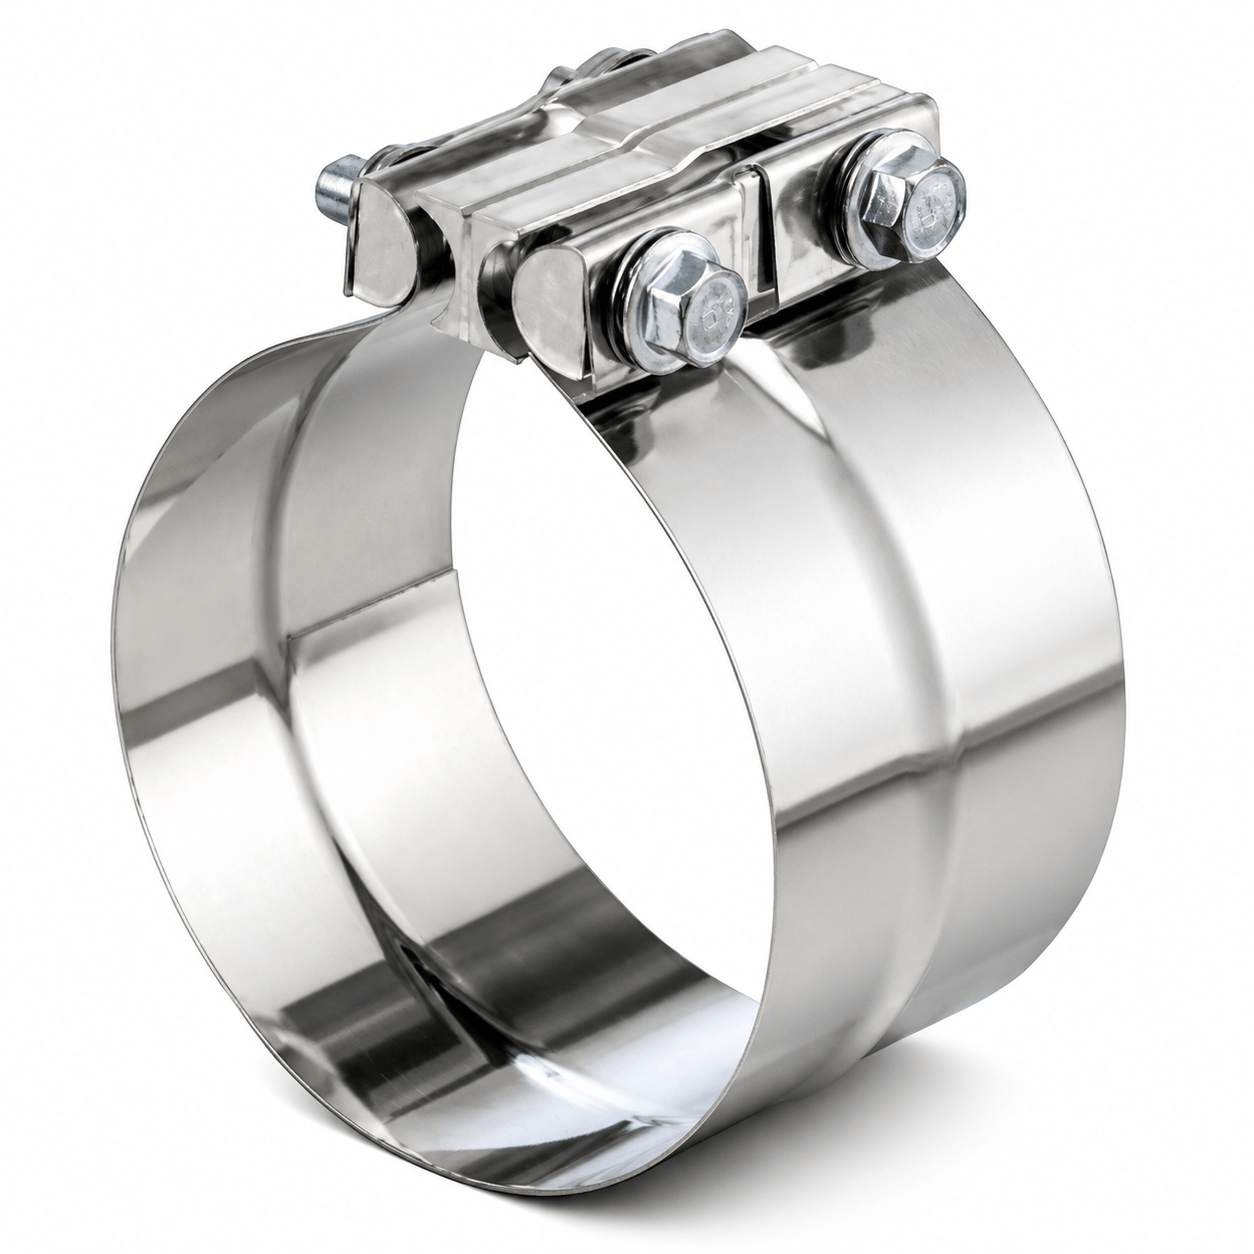
Start with 2 extra pre-formed band clamps and a piece of flex pipe (at the bare minimum).
Realistically, you’ll probably need more. Double check your setup beforehand just to be safe.
Remember to order enough flex pipe material and flex clamps at both ends, securing it to the rigid exhaust pipe tubing.
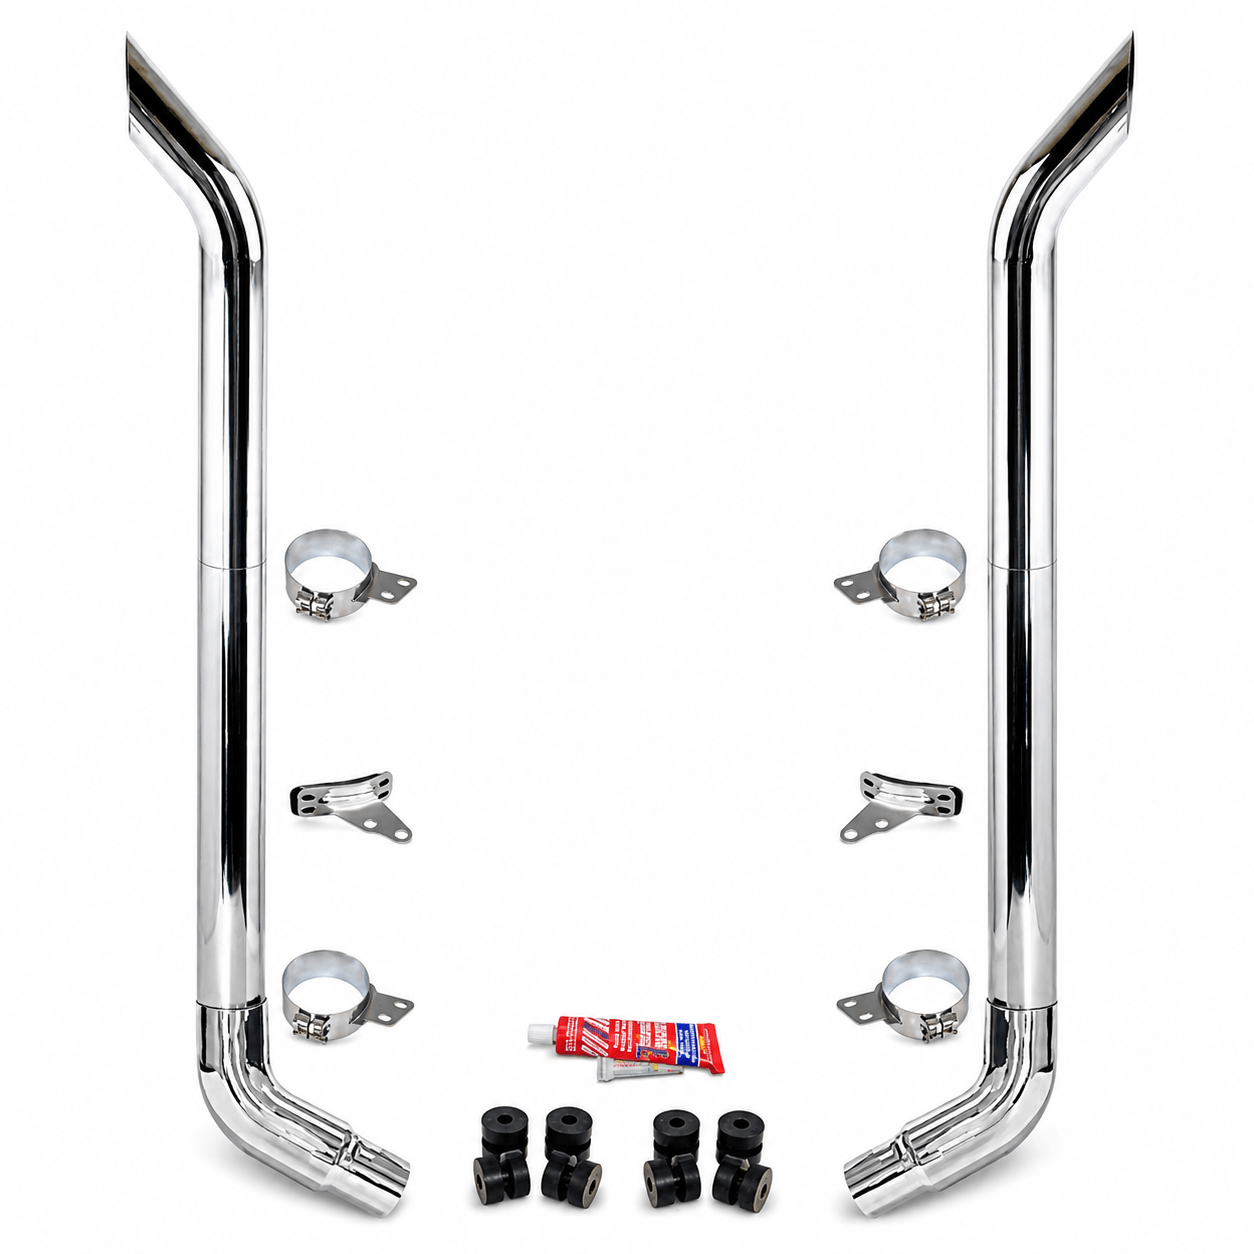
#2. Buy a Peterbilt 379 Exhaust Kit
There’s nothing worse than chasing down individual pipes, clamps, and elbows because you forgot to grab a spare.
Save time. Buy a kit.
The Peterbilt 379 exhaust kit has nearly everything you need for DIY-installations.
At 4 State Trucks, we sell complete 379 exhaust system replacements so that you’re not stuck in the garage Saturday with a disassembled exhaust system waiting for more parts before you start work on Monday!
Choose From:
- Unibilt vs Non-Unibilt Sleeper Styles
- 96", 102", 108", 114", and 120" height options
- Standard (factory-style) vs Quiet spools
- Exhaust stack lengths of 52" (2003 and earlier) and 55" (2005 - 2007)
Peterbilt 379 Exhaust Pipe Sealant: Silicone vs Foil
The exhaust kits come with silicone adhesive to hold the pipes together. Once silicone heats up and dries, it acts as a permanent seal. The pipes will NEVER come apart in one piece.
So, there's no room for mistakes.
Lets' say you leave the garage to talk on the phone. When you return, those Peterbilt 379 chrome stack tops happen to be pointed in different directions. The silicone has had enough time to seal them in place.
Now they won't move. You'll have to restart the installation.
The Downside:
- Spend more money on new parts.
- Endure more downtime.
This is part of the reason why some drivers prefer using heavy-duty aluminum foil (a temporary adhesive). The reinforced foil is folded over a pipe joint and acts like a leak-free gasket between the two joints.
Extremely hot exhaust temperatures melt the foil over time. When you need to swap out pipes, they're easily removed without breaking apart.
What's Included in a Peterbilt 379 Exhaust Kit

Our Peterbilt 379 exhaust kits come with new lower brackets, and even the bolts to secure them, and the grommets to go from the bracket to the clamp, and the hardware to complete the entire exhaust up until the bottom of the elbows or the front of the y-pipe.
But it depends on what kit you buy.
Once you get to the front of the y-pipe and onward, there’s nothing in the exhaust kits to hold that stuff in place.
You'll need something else.
#3. Buy Y-Pipe Hangers for Peterbilt 379
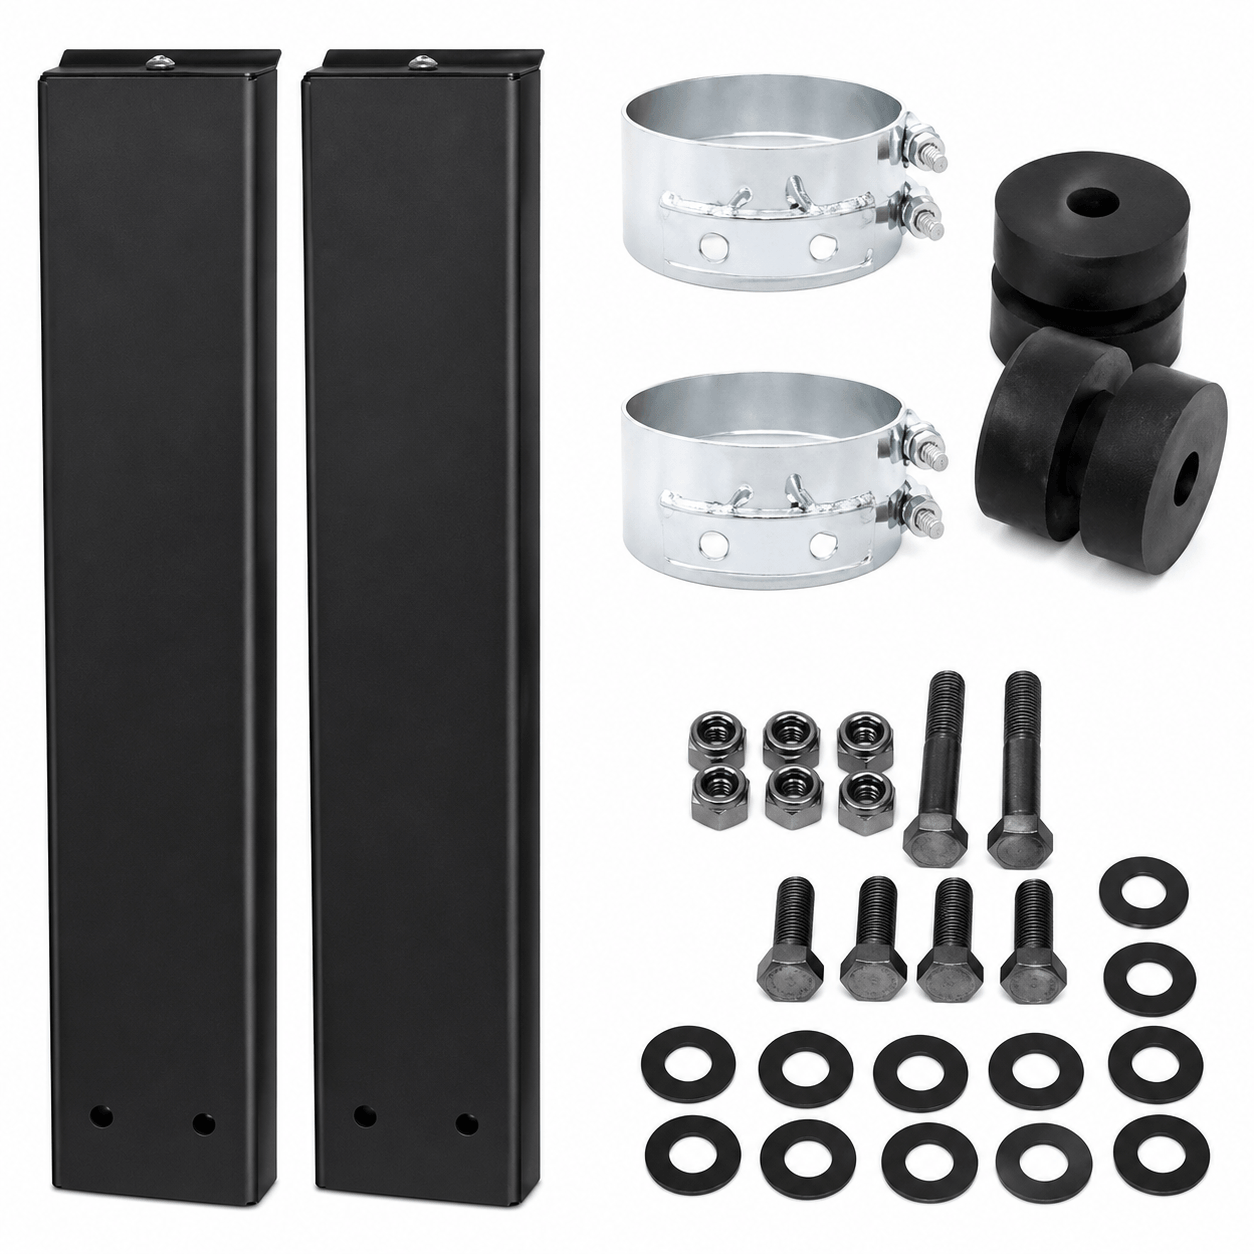
Y-pipe hangers are essential for holding the lower portion of your exhaust setup secure beneath the truck. Without them, the bottom exhasust components are going to break off and scatter along the highway.
The Peterbilt 379 exhaust kits don't come with y-pipe hangers, or the related hardware to hold them in place.
Thankfully, we don’t leave you (or your exhaust) hanging!
We sell complete y-pipe hanger kits.
Y-pipe hanger kits are absolutely essential for owner-operators looking to install long drop Pickett style exhaust setups.
Here's another tip.
You can actually custom fabricate your own y-pipe hangers; however, a pre-made set is far more convenient.
It saves you time and effort.
#4. Remove the Entire Existing Exhaust System
Reusing old hardware and road-worn pipe connectors is risky. Exhaust hardware experiences intense heat which leads it to break. It's common. Drivers will be in the middle of installing their new exhaust kits when a single lug nut seizes up and snaps right off. Now you're scrambling to find a replacement!
Is removing all of the exhaust components more expensive? Yes. But it's far more efficient and mitigates the risk of expensive downtime.
But if you just have a weekend to finish your brand-new exhaust installation and get back on the road by Monday, this is, by far, the easier option.
Use a grinder with a cut off tool to just remove everything. Cut it all off and swap it with new components. This alone will save you enormous time and stress.
#5. Never Reuse Old Flex Pipe Tubing (Here’s Why)

While you’re driving down the road, the Peterbilt 379 cab bounces up and down while the frame remains stable. The exhaust pipes are mounted to the cab. They move right alongside it.
Something has to give. The flex pipe is what absorbs the motion.
Think of flex material like a Chinese finger trap. The harder you pull on the flex pipe, the more it tightens and clamps down. It’s nearly impossible to remove it once it adheves.
At 4 State Trucks, we sell pre-cut flex tubing in various lengths which can be easily sliced with a grinder cutoff tool for appropriate sizing.
Let’s say you want 3 feet of flex tubing. You buy 36-inch flex pipe with 2 pre-formed band clamps. This will reach all the way from the frame pipe to the y-pipe.
Expensive? Sure.
It is far less expensive than the excessive downtime of dealing with stubborn, old flex tubing for days on end.
#6. Use Anti-Seize on All Stainless-Steel Exhaust Hardware

Use anti-seize lubricant on all your stainless-steel exhaust hardware.
“Why? Isn’t stainless material corrosion-resistant?” You ask.
All exhaust hardware experiences high-pressure heat and wears down. For instance, when you thread a nut onto a bolt, it has a tendency to cross thread itself and seize up. Your exhaust installation project is now on hold.
The anti-seize solution will lubricate the hardware and prevent it from getting stuck in the first place. This saves you tremendous headache. Anti-seize can be found at nearly any local big-box hardware store or online auto parts shop.
#7. Never Use Impact Tools (Only Hand Tools)
Only use hand tools. Hand tools offer a gentler approach when dealing with stainless steel material.
Impact tools are too powerful and can cause damages.
An impact driver tool loves to walk a thread and then cross that thread. When that happens, you're stuck.
You’ll need to rush to Lowe's to search for matching replacement hardware.
#8. Visually Inspect the Exhaust System Before You Place an Order
Crawl under the truck and perform a visual inspection.
Your exhaust parts might seem fine at first glance, but after looking closely, it's a rusted mess underneath.
The hardware and band clamp connectors will probably need replacements.
Exhaust temperatures range 500°F to 1,400°F and, over time, breakdown the brittle hardware.
Here's a potential scenario:
It’s a Sunday afternoon and the parts shop is closed, and you’re going to work on Monday. Now you're stuck waiting on new parts.
Inspect the exhaust before placing an order. This way, you know exactly what's wrong and what needs replacement.
Tip: Start the inspection at the turbo and move upwards through the exhaust system.
Watch for these red flags:
- Rusting at the joints
- Black soot at the joints (eg. this indicates a leaking system that’s likely rusted from within)
#9. Verify the Parts Shipment Before Disassembling the Exhaust

Here’s a frustrating scenario:
You’ve laid out all your shiny chrome, you’re ready to begin installing those sleek-looking chrome stacks, but you’re MISSING one or two minor exhaust components!
You've already removed your truck's exhaust. And once it's off, it can't be put back on.
You are stuck waiting on new replacement parts to arrive.
These nightmare scenarios can happen. When they do, it's ergregiously expensive in terms of downtime.
The reason? Perhaps the truck parts company might have mispackaged or mislabeled the item before shipping it.

The solution? Be proactive.
Never forget to verify the quantity and condition of the exhaust parts BEFORE disassembling the existing exhaust.
In fact, one Peterbilt 379 owner had received mismatched chrome stack tops: an Aussie turn-out and a flat top stack. Short on time, he had to get back on the road.
He spend two weeks driving down the highway looking like that.
Lesson? Inspecting the newly-arrived parts before you start the exhaust installation is absolutely essential.
Side Note: For Peterbilt 379 models made in 2004 (and a lot of Peterbilt Glider models), the exhaust brackets at the top are flipped upside down.
Why? No particular reason. 2004 was a bridge year for Peterbilt.
Carefully examine your replacement parts order.
It might seem right, but the fitment will be wrong.
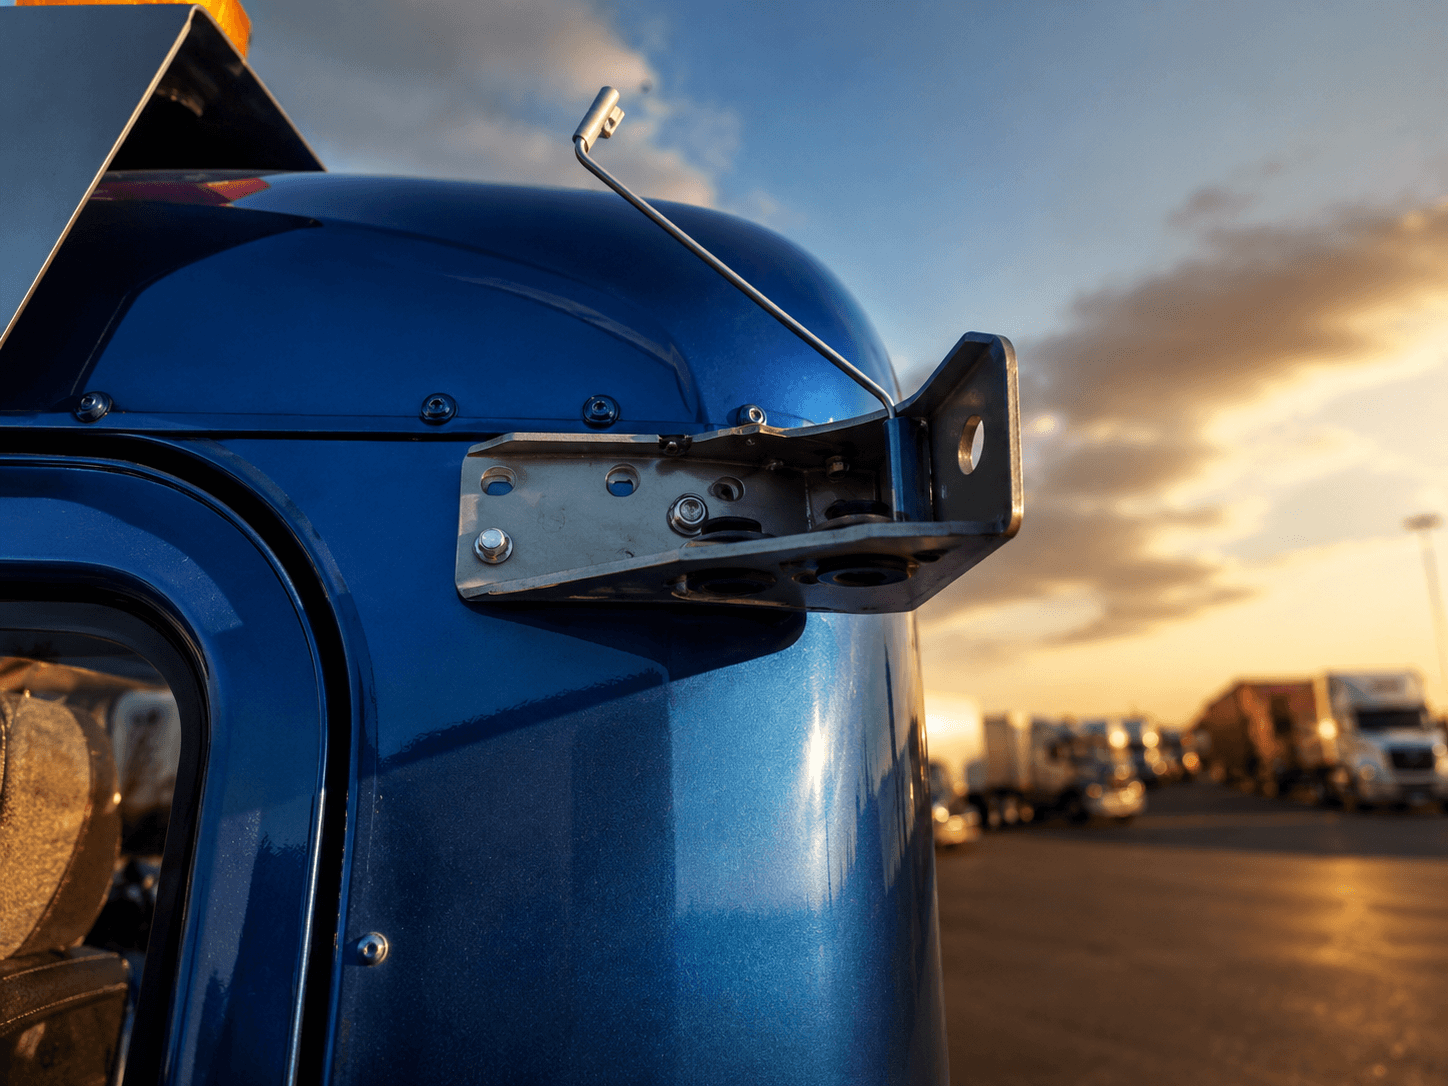
It's the EXACT SAME bracket, just reversed, making the center section a few inches higher than normal.
This trips up Peterbilt 379 owners who think they've ordered the right hardware and overall stack height on paper, but suddenly realize that it doesn't fit the truck brackets.
Shop for Peterbilt 379 Exhaust Parts at 4 State Trucks
Hopefully these tips help you avoid expensive downtime and achieve a smooth one-and-done Peterbilt 379 exhaust installation. At 4 State Trucks, we stock everything you need to refurbish your exhaust system, including replacement exhaust pipes, elbows, flex connectors, mufflers, brackets, grab handles, hardware, and more.
Shop online, drop by the 4 State parts shop in Joplin, Missouri, or order your next part on the 4 State Mobile App today!
Recent Posts
-
How 4 State Trucks Helps Drivers Source Parts Without Costly Delays
 For an owner operator, every minute of downtime is costly, and a potentially business-ending scenari …24th Jul 2026
 -
Haul of Fame - Loud N Heavy: How Davis Brothers Designs Turned a Famous Show Truck Into a Legend of Its Own
 Davis Brothers Designs transformed a renowned Peterbilt 389 show truck into "Loud N Heavy," a functi …24th Jul 2026
 -
How to Prep Your Truck for a Truck Show
 Getting a working semi-truck ready for a show is a massive undertaking that goes far beyond a standa …20th Jul 2026
 -
Spare Semi Truck Parts Every Owner-Operator Should Keep
 For owner-operators, having the right spare parts on hand is the difference between experiencing dev …17th Jul 2026
 -
Stud Pilot vs Hub Pilot Wheels: What's the Difference?
 If you're looking to shop replacement wheels or wheel-end accessories, mixed Ecommerce inventories c …13th Jul 2026
 -
How to Install Rear Fenders on a Peterbilt 379
 The process of installing rear fenders on a semi truck, specifically a Peterbilt 379 model, will dep …8th Jul 2026
 -
7 Best Exterior Chrome Upgrades for the Kenworth W900A
 Outfit your Kenworth W900A model with stunning exterior chrome accessories and stainless-steel upgra …6th Jul 2026
 -
Essential Kenworth W900A Restoration Parts (100% Bottom-Up Rebuild)
") When restoring a classic Kenworth W900A from the 1960s or 1970s, the ultimate goal is honoring that …29th Jun 2026
When restoring a classic Kenworth W900A from the 1960s or 1970s, the ultimate goal is honoring that …29th Jun 2026 -
Haul of Fame: Maggini & Sons Trucking's Legendary Lucky 13 Peterbilt 379
 Every once in a while, a truck comes along that does more than haul freight—it leaves a lasting mark …24th Jun 2026
 -
How to Find the Right FL70 Parts Using Your VIN
 To identify the right Freightliner FL70 parts, you must use your 17-digit VIN and the factory spec d …24th Jun 2026