



Semi Truck Brake System Maintenance Guide
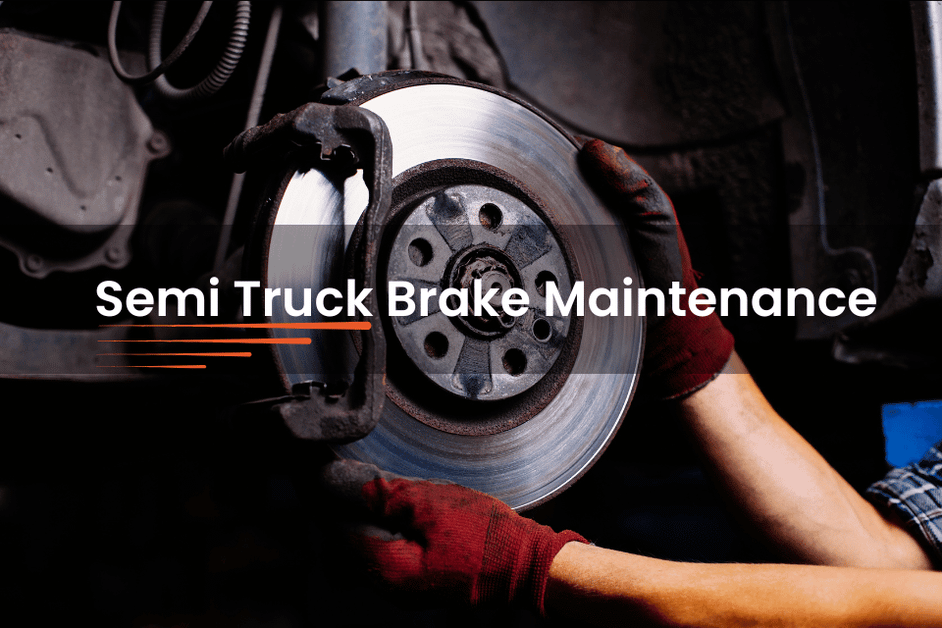
Semi-truck brake defects account for 30% of out-of-service violations, according to CVSA’s 2025 International Roadcheck.
OOS violations will get you shut down on the spot - no matter what it is.
Whether the DOT inspection found something as trivial as a busted brake chamber or a worn-out rotor disc, if they catch it, you're fined.
That OOSV gets put on your CVSA scorecard and attached to your truck's DOT number. Now, every time you pull into the weigh station, you're looking at another end-to-end inspection, just due to your record!
Just like repairing a bad credit score, it'll take time to dig out of that hole.
You can avoid ALL of the hassle by doing one simple thing.
Practice good brake maintenance.
Here’s what you’ll learn reading this blog:
- S-cam drum-brake inspection checklist
- Air-disc brake inspection and pad replacement tips
- Seasonal semi truck brake maintenance checklists
How to Maintain Your Semi Truck Brake System
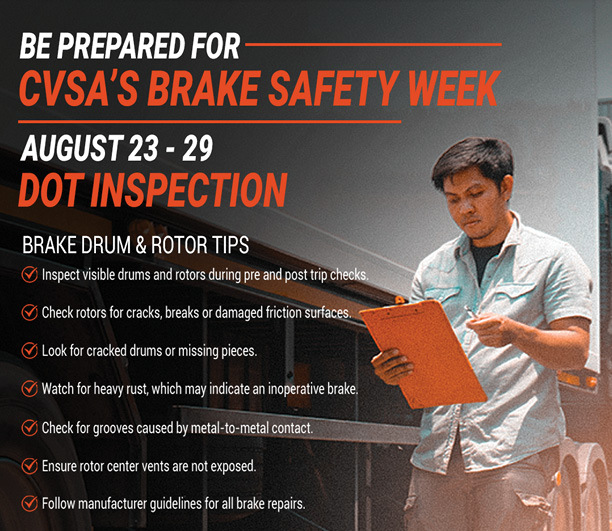
1. Briefly Inspect Brakes (Daily)
Inspect tractor/trailer brakes pre- and post-trip.
Look for the obvious:
- Cracked, rubbed, swollen, bulging, or leaking rubber and nylon air lines
- Air hoses that chafe against nearby parts
- A hissing sound that may point to an air leak
- Loose fittings or damaged gladhands and seals
- Rusted, cracked, bent, or damaged brake chambers, brackets, pins, levers, and mounting hardware
- Missing pins, clips, springs, brackets, or retainers
- Damaged or worn slack adjusters
- Loose S-cams or camshafts with side-to-side movement
- Worn or missing S-cam bushings
- Sticking brake calipers
- Worn, cracked, glazed, or grease-soaked brake pads, shoes, and linings
- Oil or grease on brake drums and rotors
- Cracked, rusty, scored, or heat-damaged drums and rotors
- Leaking wheel seals that can contaminate the brake surfaces
Check each wheel.
A single weak brake means your truck won’t stop evenly.


2. Test the Air-Brake System
You need two people to test this.
Make sure the air system builds and holds pressure correctly.
Check:
- Air-pressure buildup: The compressor should build pressure at the proper speed.
- Governor operation: The compressor should start and stop charging at the correct pressure.
- Air leaks: Watch the gauges with the brakes released and applied.
- Low-air warning: Make sure the light and buzzer turn on before pressure drops too low.
- Spring brakes: Check that the parking-brake controls activate at the correct pressure.
- Parking brake: Gently pull against it in low gear.
- Service brakes: Roll forward slowly and apply the brakes.
Watch for pulling, slow stops, excess vibration, or an unusual pedal feel.
Federal guidance allows these maximum pressure losses in one minute:
- Single vehicle, brakes released: 2 psi
- Combination vehicle, brakes released: 3 psi
- Single vehicle, brakes applied: 3 psi
- Combination vehicle, brakes applied: 4 psi
If you spot an air brake leak, you can fix it before it becomes a serious issue.
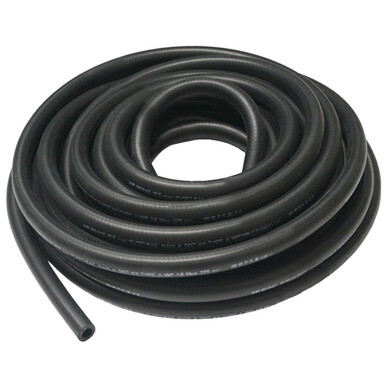
Air brake hose repair kits help you repair a damaged fitting or hose end without replacing the entire air hose.
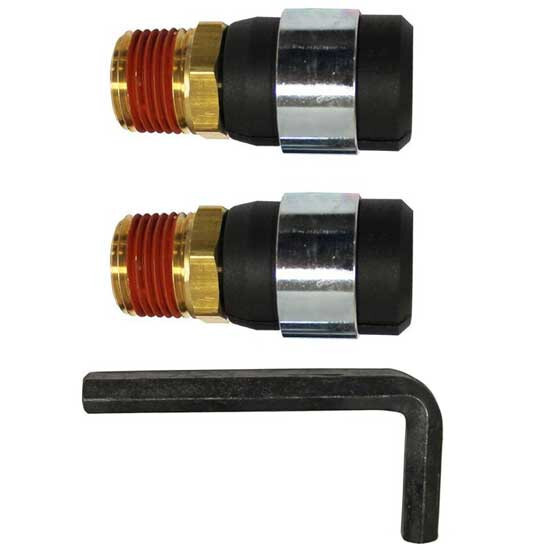
This $17 part can potentially save you hundreds or thousands in punishing fees from a weigh station inspection.
A lot of trucks have plastic air lines. These you can cut, add a Tee branch fitting on the end, and put it back on your truck - done.
Be warned: Severe damage (kinks and abrasions) cannot be repaired.
This is why you A. perform regular brake system checks and B. keep spare air line hoses and fittings on your rig 24/7.
You just never know.
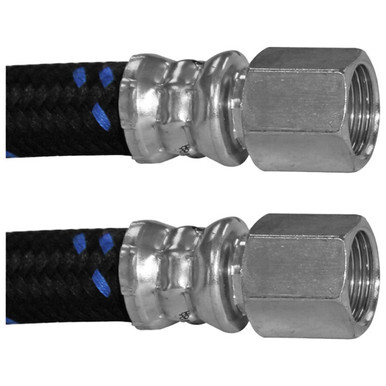
Braided air line hoses are true heavy-duty, tear resistant products that can't be repaired; these just need to be replaced outright.
Nearly every professional owner-operator stores a kit full of air line fittings and connector pieces just as a precaution.
3. Measure S-Cam Pushrod Stroke
The pushrod is a metal bar that thrusts out of the round air chamber when you put your foot on the brake.
The pushrod’s stroke distance shows whether the S-cam brake chamber can apply maximum brake power.
Tools You Need
Gather these basic tools:
- Wheel chocks
- Chalk or soapstone
- Ruler or measuring tape
- Brake pedal depressor or a helper
Prepare the Truck (Safely)
Before measuring the pushrod:
- Park on flat, level ground.
- Place heavy wheel chocks against the drive wheels.
- Chock the trailer wheels when needed.
- Build the air pressure to 90–100 psi.
- Release the spring parking brakes.
- Make sure each pushrod returns to its resting position.
- Turn off the engine and remove the keys before working under the truck.
Don’t judge the brake adjustment by how the pedal feels when you press down.
It won’t be accurate.
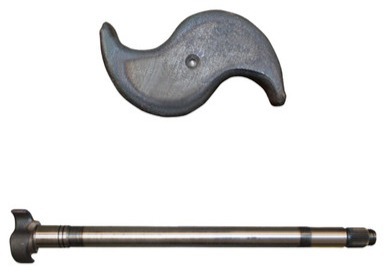
S-Cam Shaft Replacement
- Stops faster: Pushes down with full stopping power.
- Fix sticky brakes: Smooth rod lets brakes release instantly.
- Preserve brake pads: Even pressure reduces pad wear.
- Adjusts brakes: Ensures tight alignment of brake components.
How to Measure the Pushrod Stroke:
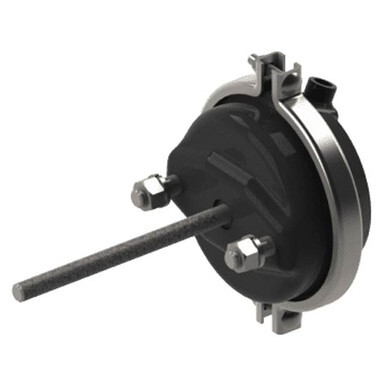
- Chock the wheels and release the park brakes
- Ideal air pressure: 90 to 100psi (620-690 kPa)
- Confirm brake type (long or short) by looking at the metal ID tag
- Use chalk to draw a line on the pushrod from where it exits the air brake chamber
- Get a friend to step down fully on the brake pedal and hold it while you listen for air leaks
- Use your ruler to measure the distance from the chalk mark back to the air chamber.
THAT distance is your stroke measurement!
Too much pushrod travel? You might have worn linings, bushings, pins, or a failed adjuster.
Too little?
It might mean the slack adjuster seized, the return spring broke, the brakes are binding, or the internal chamber is restricted.
Push Stroke Results: Safe vs Unsafe Brakes
The safe limit depends on the brake chamber’s type, size, and rated stroke.
Short-stroke chambers (Type 6): rod moves 1 and ¼-inches (almost never seen on big rigs).
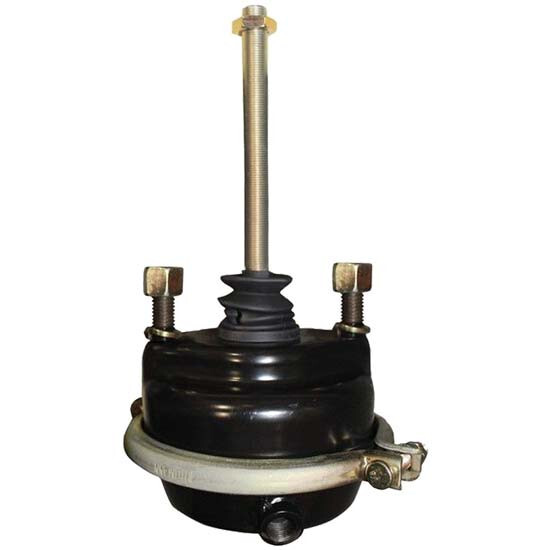
Standard Type 16, 20, or 24 Brake Chamber: rod moves 2 ¼ inches.
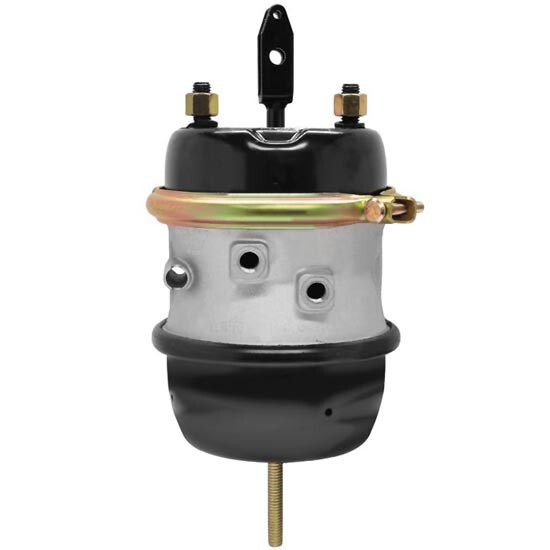
Long-stroke chambers (Type 20, Type 24 & 30/30): rod pushes 2 to 2 ½-inches (maximum).
If your brake chamber exceeds these limits, hire a technician to fix it ASAP.
You’ll likely need to replace worn-out clevis pins, bushings, cracked drums, or a failed self-adjusting brake adjuster.
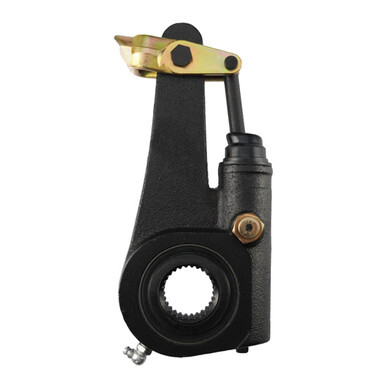
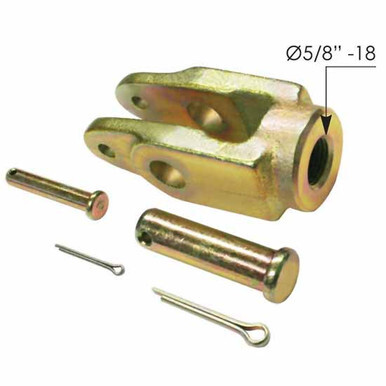
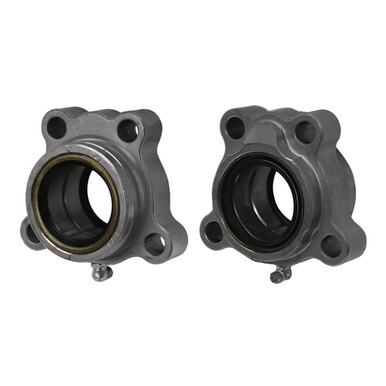
Get every single replacement brake component you could need from one spot: 4 State Trucks.
4. Check the Brake Pad and Lining Thickness
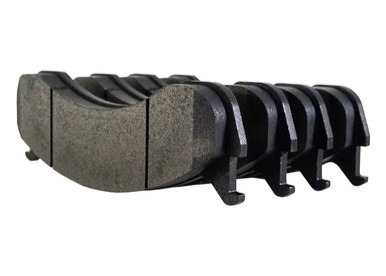
Replace worn brake material before it reaches the legal minimum level of thickness.
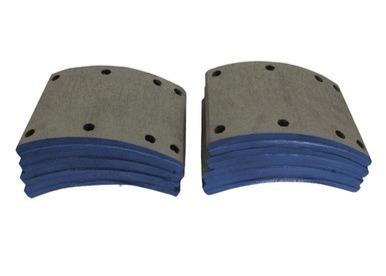
Federally mandated minimums include:
- Steering-axle drum brake with continuous lining: 3/16 inch
- Steering-axle shoe with two pads: 1/4 inch
- S-cam brake: 1/3-inch thick from center
- Other air drum brakes: 1/4 inch
- Air-disc brake pads: 1/8 inch
Replace parts when they reach a marked wear indicator.
Do not wait until the brakes reach the minimum limit.


Remember the basics:
- Drum brakes use shoes and linings.
- Disc brakes use pads and rotors.
5. Inspect the Full Air-Disc Brake Assembly
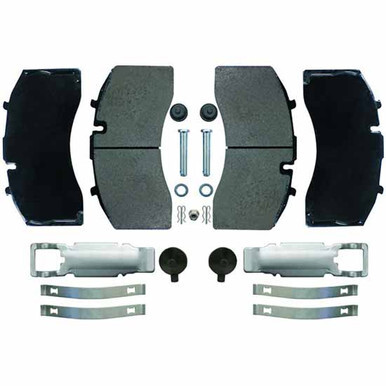
- Park on flat ground and chock the wheels.
- Remove the old pads by loosening the adjuster and removing the clip, pin and metal bar.
- Clean the area and check for surrounding damage.
- Slide in new pads that sit straight in the holder; lock them with new clip, pin, and metal bar.
- Adjust the fit so there is enough space between the pads and rotor to avoid drag.
- Test the brakes and listen for squeaks, grinding, or vibrations before driving.
Go beyond the brake pads…
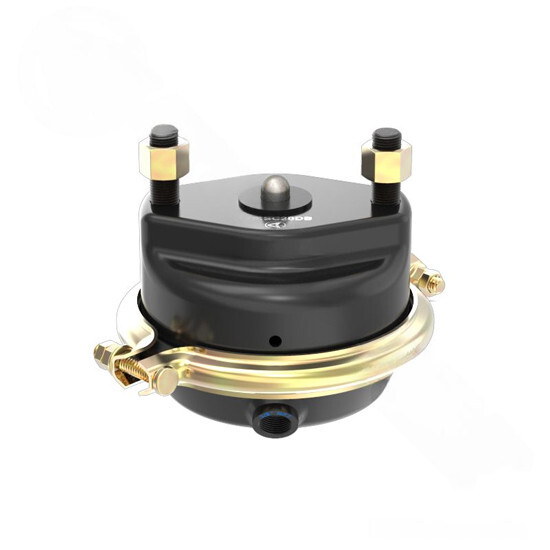
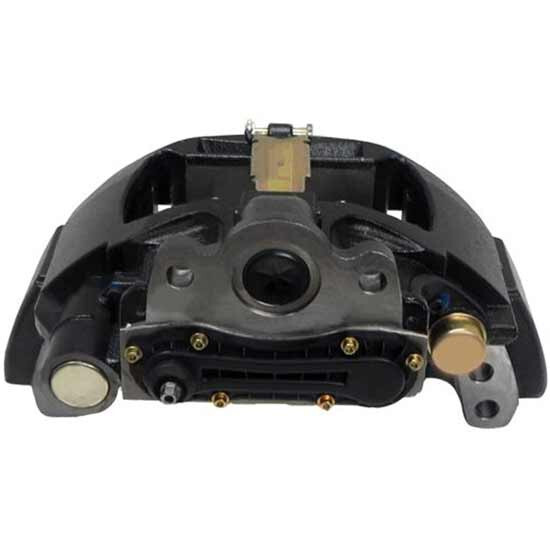
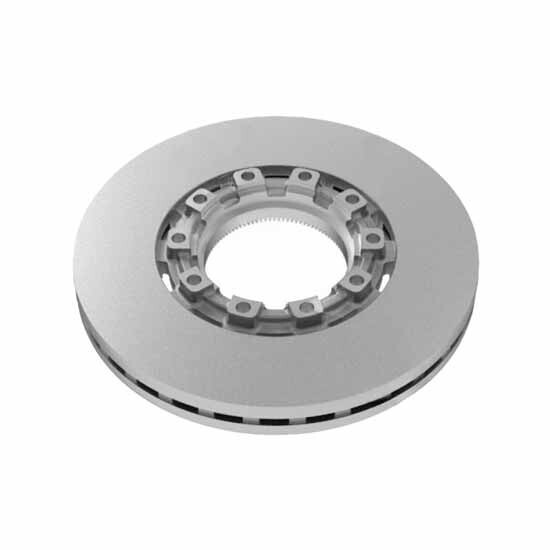
- Check the pads and rotor disc: identify any excess thinning or cracked, rusted metal.
- Check the clamp (caliper): spot notable damage or debris on the rubber covers (boots).
- Check the small hardware: ensure the small metal clips, pins, and washers are in place and not brittle or missing.
- Check the air lines: look for cracked, leaking, or thin air line hoses.
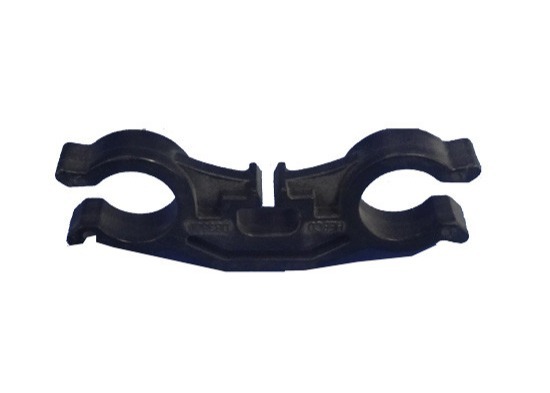
Air Brake Hose Separator
- Stops rubbing: Stops air hoses from chafing.
- Keeps lines neat: Stops twists, snags, or tears.
- Avoids fines: Safe, organized hoses that pass inspection.
- Protects air pressure: Smooth airflow to brakes w/o leakage.
Remember to Check:
- Caliper movement
- Guide pins and bushings
- Rubber boots and seals
- Clips, springs, pins, and retaining bars
- Brake adjuster operation
- Rotor thickness and condition
- Pad-wear sensors
- Clearance between the pads and rotor
Replace pads on both sides of the same axle to help the truck brake evenly.
Follow the service manual for your exact brake system.
6. Maintain the Air Dryer and Tanks
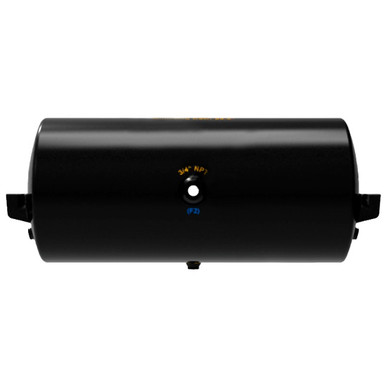
Drain water, oil, and dirt from the air tanks. The compressor will refill them with air.
Check the Following:
- Air tank drain valves
- Water or excess oil inside the tanks
- Air-dryer cartridge
- Purge valve
- Delivery check valve
- Dryer mounts
- Compressor discharge line
- Slow pressure buildup
- Frequent compressor cycling
Repeated moisture may point to a bad air dryer, compressor, or valve. Find and repair the root cause.
7. Check the ABS and Trailer Brakes
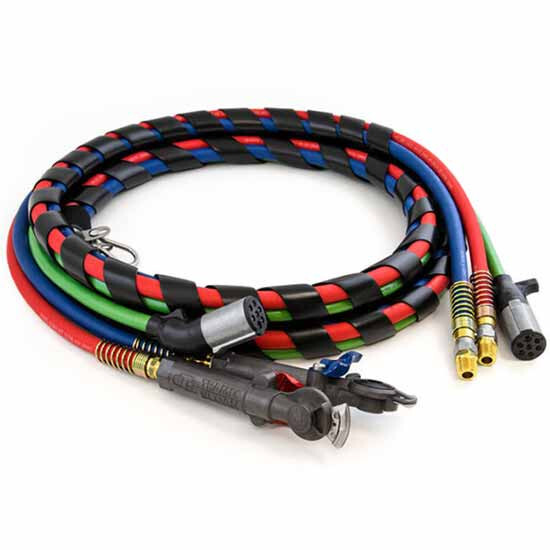
During startup, make sure the tractor and trailer ABS lights turn on and then off.
Also check:
- Trailer electrical connections
- Service and emergency air lines
- Gladhand seals
- Trailer brake application and release
- Tractor-protection system
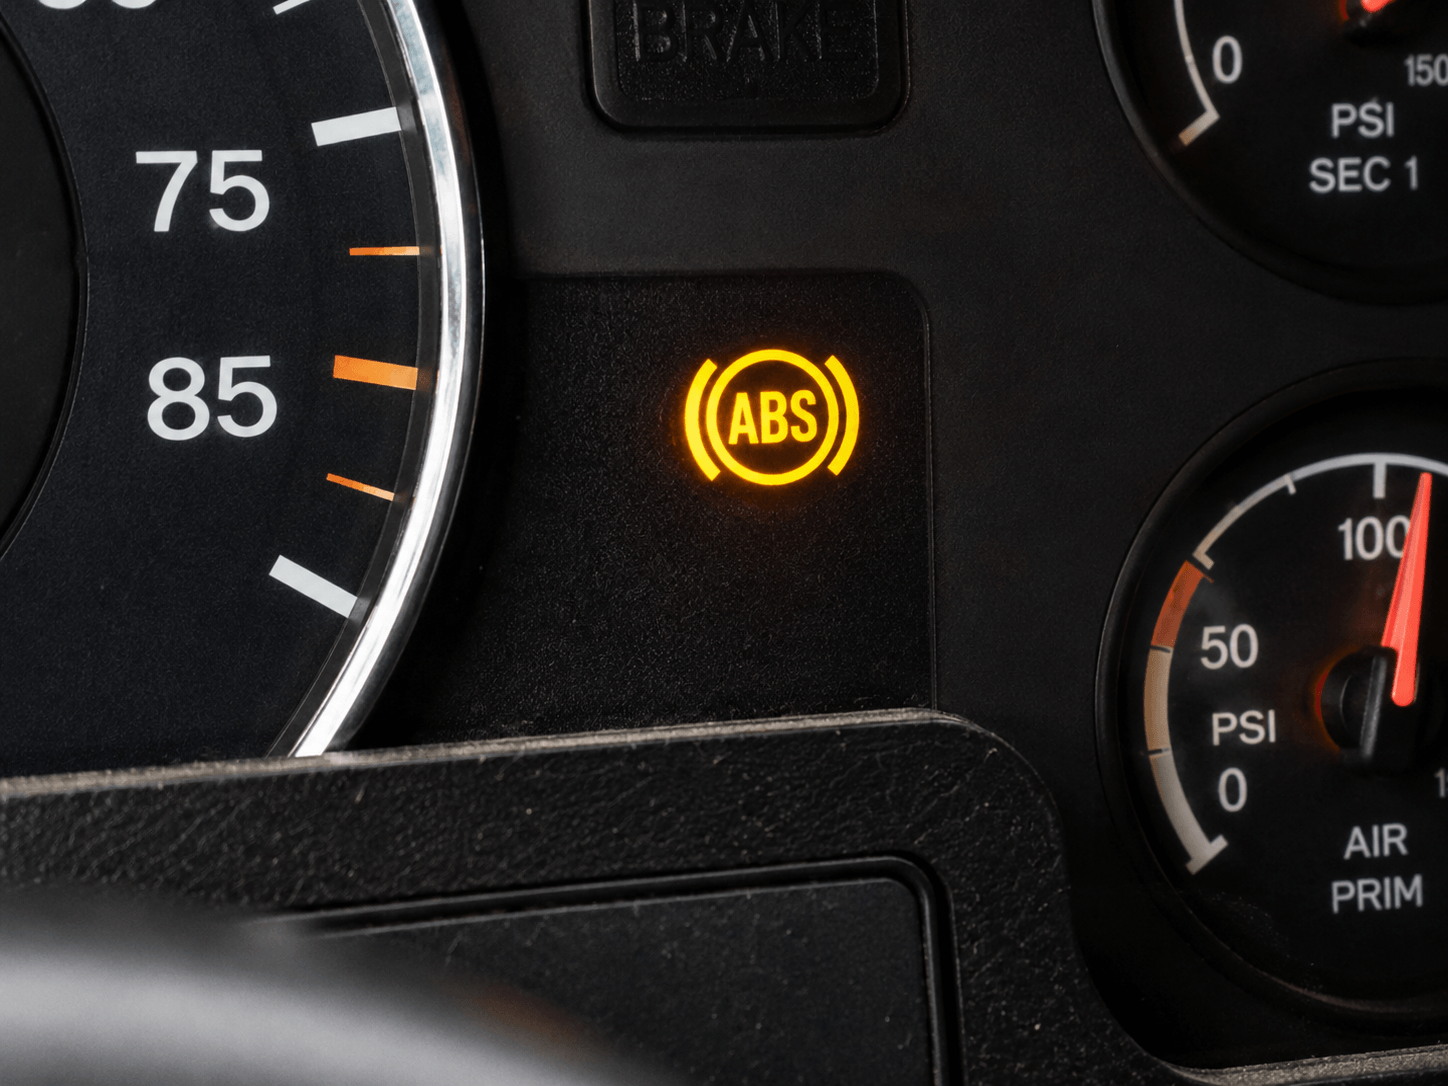
If the ABS light stays on, you need service.
8. Follow the Correct Service Schedule
Freightliner, Kenworth, and Peterbilt trucks may use different brake parts and systems. Follow the service schedule for the parts installed on your truck.
Adjust your maintenance schedule based on:
- Highway or vocational work
- Mountain routes
- Heavy loads
- Stop-and-go driving
- Road salt and moisture
- Hot or cold weather
- Past brake wear
Hard use means you should inspect and service the brakes more often.
9. Keep Solid Brake Maintenance Records
Record this Information for the Future:
- Inspection date
- Truck and trailer mileage
- Pushrod measurements
- Pad or lining thickness
- Drum and rotor measurements
- Air-pressure and leak-test results
- Parts replaced
- Technician’s name
- Next service date
Good records help you catch wear early, plan repairs, and stay compliant.
Seasonal Semi Truck Brake Maintenance Guide
| Season | Primary Risk | Key Focus Areas | Priority Maintenance Action |
|---|---|---|---|
| Spring | Salt corrosion & trapped water | Chambers, slack adjusters, air tanks, S-cams | Drain air tanks, wash off road salt, lube moving parts |
| Summer | Extreme heat & brake fade | Linings, drums, rotors, wheel seals, calipers | Check for heat-cracking, glazing, and hub seal leaks |
| Fall | Summer wear & freeze prep | Air dryer, purge valve, hoses, lining thickness | Replace air dryer desiccant; check remaining friction material |
| Winter | Freezing air lines & corrosion | Gladhand seals, valves, air lines, brake shoes | Keep moisture out of lines; check for dragging or frozen shoes |
Winter, of course, is the season you need to prepare for the most, as cold weather will lead to a service brake taking even longer to come to a full stop.
Spring: Corrosion, Moisture, and Stuck Brake Parts
Spring inspections are all about recovering from the corrosive road salt and dramatic temperature changes from winter.
Critical Brake Parts to Inspect:
- Chambers & Pushrods: Inspect housings for heavy rust, cracking, or air leaks.
- S-Cams & Slack Adjusters: Grease high-friction pivot points to prevent binding from salt-contaminated grease.
- Air Tanks & Purge Valve: Drain accumulated moisture; inspect tank bodies and drain valves for corrosion.
- Lines & Gladhand Seals: Check flexible hoses for cracking and seals for rot or grit.
- ABS Connections: Inspect wheel-speed sensor wiring and connectors for salt corrosion.
Spring is a great time to drain the air tank, inspect it for leak points, rust, add fresh grease lubricant to those high-friction brake components, and check the brakes' functionality.
Watch for tiny spots of oil near the hydraulic brake lines.
If you see oily residue around the drum brake chambers, there's a 100% chance that you're dealing with a ruptured brake line.
It doesn't end there.
Corrosive salt or excessive moisture can cause rust to form around brake hardware, fittings, and electrical connections.
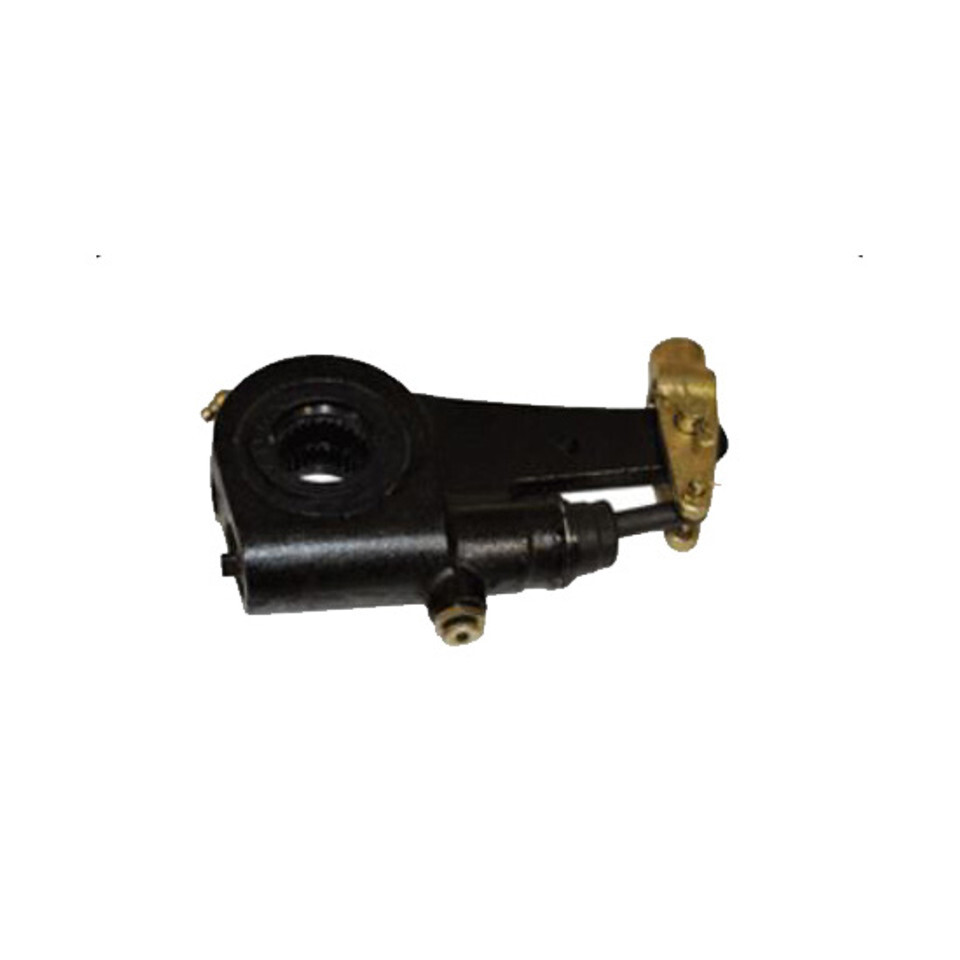
Contaminated hydraulic grease might also cause S-cams and slack adjusters to bind.
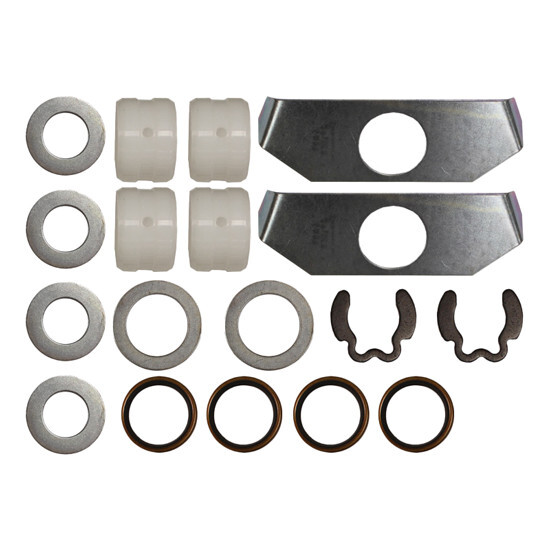
Check the camshaft bushings and hardware. If it's damaged, you can quickly replace them with an all-in-one camshaft repair kit.
Final Tip: moisture can collect in the air tank, and moving from frozen to liquid and back again, corrodes the tank.
Inspect it carefully. If you have to, drain it.
Summer Season: Brake Check Wear-n-Tear
Summertime temperatures do not impact brakes nearly to the same extent as winter weather does.
The way you use your brakes is what makes the difference.
Summer heat can trigger pre-existing issues.
So, practice preventative maintenance. Check your brake chambers, seals, and diaphragms during the summer.
High heat, pressure, and aging are brake killers.
A brake chamber seal can rupture suddenly, spilling oil everywhere simply due to a damaged rubber diaphragm, high air pressure, and rusted metal housings that can't keep up anymore.
Prioritize identifying the following:
- Friction Material (Pads/Shoes): Inspect for thin linings, uneven wear, or heat glazing.
- Drums & Rotors: Check for heat checks, deep scoring, or blue/dark thermal discoloration.
- Wheel Seals & Hubs: Look for leaking hub oil across the backing plate or inner wheel edge.
- Brake Drag: Ensure calipers and return springs retract fully. Dragging generates extreme heat, accelerating wear and risking wheel-end fires.
With heavy, forceful brake use under high-pressure conditions (think steep inclines in Colorado mountain passes), the brakes fade.
Naturally, your truck's stopping power decreases.
If the brake pedals stay clamped to the rotor (brake dragging), it generates even more heat. The cause might be a sticking caliper, seized S-cam, weak return spring, or rigid slack-adjuster.
Fall Season: Worn Parts, Air Leaks, and Moisture Preparation
Fall is the best time of year when it comes to trucking.
It's time to look over your entire brake system before the hardest season begins: winter.
Fall Brake Inspection Checklist:
- Lining Thickness: Measure remaining pad/shoe depth to ensure enough material remains for winter routes.
- Air Dryer & Desiccant: Service or replace the air dryer cartridge so water does not reach the air tanks.
- System Pressure & Leak Test: Measure baseline air-buildup time and perform a timed pressure-drop test to isolate small fitting or valve leaks.
- Trailer Hoses & Gladhands: Inspect lines for sun degradation, rubbing spots, or loose fittings.
Constant heat and friction will wear the brake lining thin.
Test your system’s air-pressure buildup and look carefully for leaks around hoses, fittings, chambers, and gladhands.
Consider draining and servicing the air tanks and air drier.
Winter Season: Frozen Air Lines, Corrosion, and Reduced Brake Response
Winter puts enormous stress on the air brake system – and everything else on the truck, if we're being honest.
Brake Parts Most Affected in Winter Weather:
- Air dryer and purge valve
- Air tanks
- Air lines and valves
- Gladhands and seals
- Brake shoes, pads, drums, and rotors
- Slack adjusters and S-cams
- ABS wiring and connectors
Moisture that accumulates inside the air lines, tanks, or valves might freeze and block airflow to your brakes!
Cold, sub-zero temperatures might cause slow brake application, delayed release, uneven braking, or loss of braking at one wheel.
Snow and slush might also freeze between the brake lining and drum or rotor after parking. Salt speeds up corrosion on chambers, adjusters, fittings, wiring, and mounting hardware.
Winter Brake Inspection Checklist:
- Freeze Prevention: Purge air tanks daily. Keep gladhand seals clean, soft, and clear of snow and ice.
- Frozen Shoes: Inspect for shoes frozen directly to the drum after parking in slush or deep snow.
- Response Time: Watch for delayed application or slow brake release caused by sticky, cold valves or icy lines.
- Hardware Protection: Monitor chambers, brackets, and adjusters for rapid corrosion driven by liquid de-icers.
In Conclusion: The Best Brake Maintenance Tips
One of the best ways to maintain your brakes is to own a brake maintenance log.
This simple log sheet is what helps fleets and owner-operators spot brake wear trends long before an expensive service violation puts them out of commission.
Shop Semi Truck Brake Parts & Hardware at 4 State Trucks
Get the brake parts you need to maintain your semi truck's air disc or drum brake system all throughout the year.
Recent Posts
-
Chrome vs Stainless Steel Exhaust Stacks
 Wondering whether to purchase a stainless steel or chrome exhaust stack kit? Here's a breakdown of t …28th Sep 2026
 -
How to Source Semi Truck Parts Online
 Scambling for the right parts at the last minute can get costly. Here are the best tips to consider …25th Sep 2026
 -
Haul of Fame: J&L Contracting's Award-Winning Truck
 Kenworths: Never Satisfied & Devilish Ways When you talk about Midwest trucking, heavy hauling, and …17th Sep 2026
 -
Semi Truck Exhaust Systems: Parts, Materials, Fitment & Repair Guide
 How a Semi Truck Exhaust System Works A heavy-duty exhaust system has three main jobs: route burned …16th Sep 2026
 -
Diesel Truck Engine Maintenance Guide
 Semi truck engines can last up to one million miles, or more, before they need to be rebuilt or repl …4th Sep 2026
 -
How to Buy the Right Peterbilt 379 Radiator
 If you want to keep your diesel engine from overheating you need a well-functioning replacement Pete …28th Aug 2026
 -
10 Essential Cost-Per-Mile Truck Upgrades that Pay for Themselves
 Small aftermarket semi truck accessories and performance upgrades save more money over time than the …21st Aug 2026
 -
Seasonal Semi Truck Maintenance Checklist
 Freezing winter weather temperatures, heavy snow, ice, and road salt take an unseen toll on your sem …14th Aug 2026
 -
Haul of Fame: Richard Bonner’s 1996 Peterbilt 379 — Bringing a Classic Trucker’s Truck Back to Life
 Every truck has a story, but some are worth taking a closer look at. Richard Bonner’s 1996 Peterbilt …14th Aug 2026
 -
Surviving the Scale: How to Pass Your DOT Inspection & Avoid Crippling Fees
 DOT semi truck inspections can make anyone nervous. There are multiple levels that start from a quic …7th Aug 2026